
Computer Vision, or CV for short, is the art of teaching a computer to analyze digital images such as photographs and videos to find differences or similarities to extract a conclusion. Acquiring images can be a heavy load on its own. Images can be created from sound waves, image files can be altered to provide different information, and that’s just the beginning. Extracting high dimensional data to produce numerical information is called digital signal processing. Once signals are processed, then, training the computer to analyze the information is the next talk.
Various algorithms are used in processing the signal and then again in training the computer to infer from the processed signal. Sometimes, such as in various image classification tasks, the signal does not require a lot of processing. For instance, if classifying images of cats and dogs, the computer can be trained on raw images, often downsampled to conserve time and memory. The computer is trained to find commonalities and differences and over time, will become capable of the simple binary classification task.
Linear algebra is a useful skill in CV tasks. Additional knowledge in image framing, rotation, and manipulation are used to create more accurate models. I will be working on a basic CV project in the coming weeks and will be diving far deeper into the world of Computer Vision.
To start, numpy and pandas are basic packages that will be used in the early stages, additionally using your gpu can save on time, so I would suggest downloading tensorflow gpu if you have a PC.
import numpy as np
import pandas as pd

from tensorflow.keras.utils import to_categorical

from sklearn.preprocessing import LabelEncoder
import cv2
import tensorflow as tf

from tensorflow.keras.preprocessing.image import load_img, img_to_array

from pathlib import Path
import os
from tensorflow.keras import layers
import glob
import re
import splitfolders
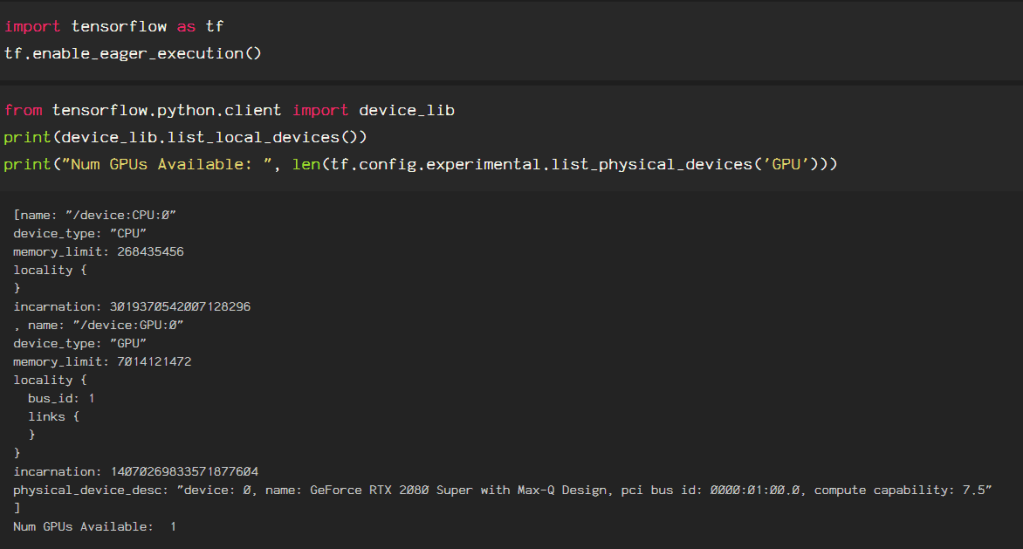
Verify your install as follows to be sure the correct version of Tensorflow is activated in your environment.
Next, import your data using Tensorflow.
datagen = ImageDataGenerator(rescale=1./255)
# load and iterate training dataset
train_it = datagen.flow_from_directory('output/train/', class_mode='categorical',  target_size=(224, 224),)
# load and iterate validation dataset
val_it = datagen.flow_from_directory('output/val/', class_mode='categorical',  target_size=(224, 224),)
This is set up to do a ResNet model, hence the target size, but typically, I keep my data shaped in pixels relating to squares of 2. For example: 256 (28 ), 512 (29 ), 1024 (210 ), 2048 (211 ). Explore your options for importing datasets, as the pixels and methods used can positively or negatively impact your model later on.
