Scraping linked in profile and automated personalized connections.
Previously, I posted about using Selenium’s WebDriver to automate the sign in process, scrape user profile headers, job experience, and education history. Once this information has been obtained, it can be used to create a ‘personalized’ message, and Selenium enables you to automate the entire process.
I am beginning this process assuming that the WebDriver instance has been created, as ‘driver’, in this case, and the sign in process has been completed using Selenium, and if you need a refresher, check out ‘Web Scraping #1’, and earlier blog that details this process.
Once you’ve logged in, just point the driver toward the linkedin profile url.

The following function is used to get the first name from the profile, and is built using the foundation of the ‘get_name()’ function from the ‘Web Scraping #2’ blog. First, the element containing the user’s name from the profile header, under the </ul> tag, class name ‘pv-top-card–list’, then from there, find the </li> elements, note the singularity of the find_element call, as this is all that is necessary to extract the first name, which is all I am using for compiling the ‘personalized’ message.

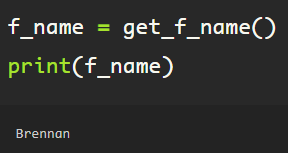
Run the function, assigning the returned value (first_name) to the variable ‘f_name’. Here, to validate that the function works correctly, I printed the ‘f_name’ value.
For this particular connection, I am using the ‘get_education’ function from ‘Web Scraping #4’, in which I went through the process of extracting data scraped from a user profile, including the experience and education section. This is to show how the information extracted can be used in the ‘Connect’ automation.

Next, I am going to direct the driver to scroll to the top of the webpage with the following line of code. I am doing this to ensure that the element is available to the Selenium WebDriver due to the dynamic nature of LinkedIn’s webpage build.

Contained within the profile cover, there lies a banner with basic information on the left side of the screen. On the right, are buttons with which the web driver can interact with Selenium’s ActionChains simulating a mouse click with ‘click()’.

First, the ‘Connect’ button is located by directing the driver to the class element belonging to the button seen on the screen, followed by the click() function, this emulates a mouse click on the button.

The next window appears after the click, and the goal is to click() on the ‘Add a note’ button, circled in blue in the image below.

To successfully locate the button, first, point the driver to the element tag</button> including the attribute ‘aria-label’, and click() it, which will prompt a new window with a text input field for a customized invitation.

Using basic python string formatting, create the message to be sent with the invitation.
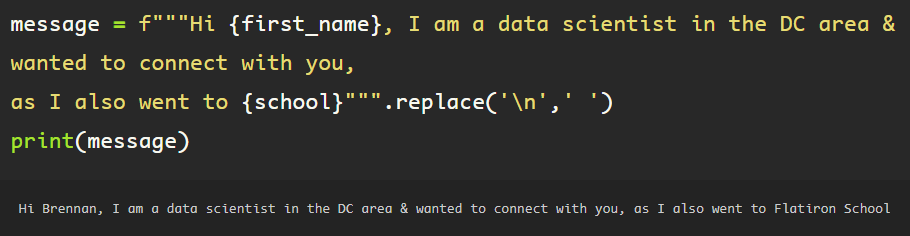
This message is formatted and assigned to the variable ‘message’ and ready to be sent to the customized invitation input.

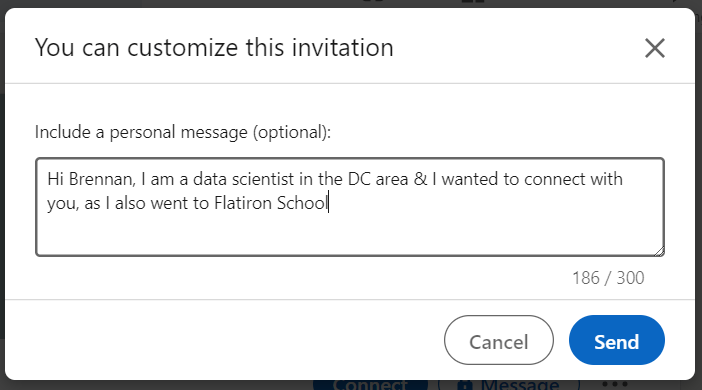
Locate the ‘Send’ button and click it to simulate the mouse click.

The message has been sent, and the window closes leaving the driver on the standard profile page.
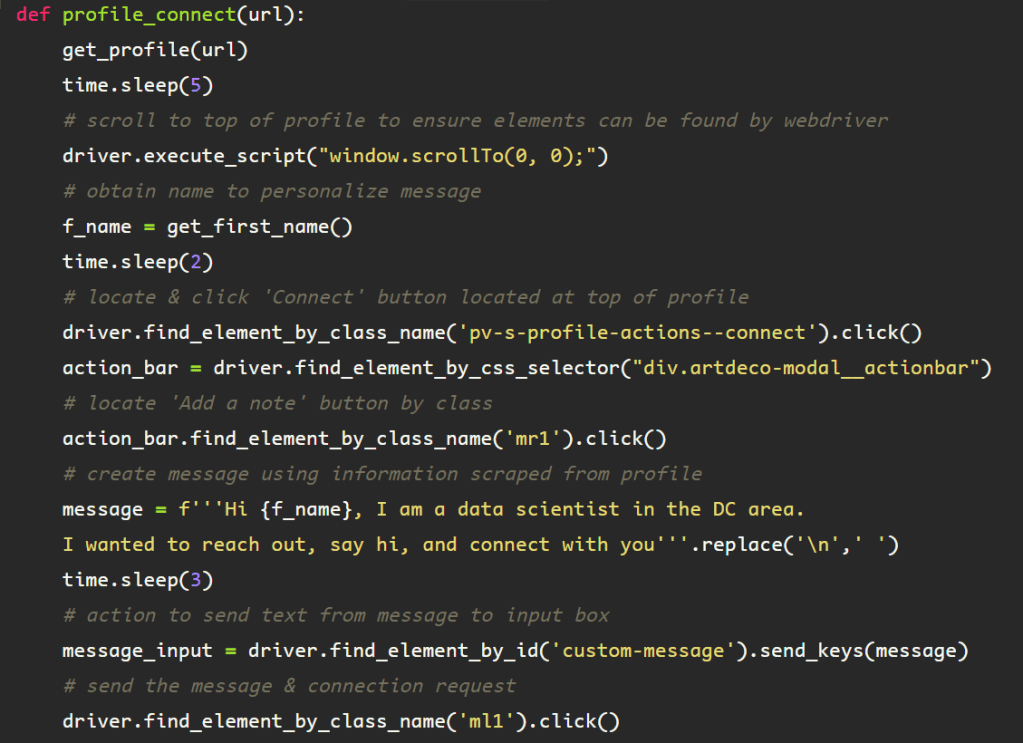
This process can be encapsulated into a function, making it easier to use when iterating through a list of urls. Changing the method used to locate the ‘Add a note’ button, instead, finding the container containing the element, then locating the element by class name, rather than through the attribute used before. This is due to timeout and element not found errors that occur when the previous elements are utilized in a loop.