Automate Your LogIn with Selenium

Web scraping is a great way of obtaining data, but with all of the data available, doing it efficiently is another story. I am starting my web scraping journey by using LinkedIn’s search function to find connections, as I am a relatively new professional in the field of data science, and with 7.8 billion people on the planet, “who” you know can be almost as important as “what” you know, and deciding what data to extract beforehand will save me a lot of self loathing down the road. This is the first in a web scraping series that can get anyone started with web scraping and automation in data collection.
To get started with Selenium, first we have to get a driver, to interact with the webpage, or ‘to drive’, essentially. I used Chrome, and the correlating driver is found here: https://chromedriver.chromium.org/. There are separate drivers for Firefox, Explorer, Safari, and a handful of others, just check the Selenium WebDriver Documentation for more info. Once this is downloaded, just unzip the download, and place the chromedriver.exe file where you’d like it to live, assuming that you’ve already installed Selenium using pip, import the following basics to begin with:

Next, define the path to the driver.exe file and define your driver, be sure your browser and driver executables match or you’re done before you get started.

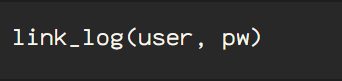
Now that you’ve got everything set up, we begin actually working with Selenium. First, create & store variables containing the user’s email as a string datatype. Do the same with your password.

The first line in the next part, which is actually used to log in and enter the password provided. The driver ‘gets’ the site. Next, the driver locates the id called “session_key”, the ‘.send_keys’ command is pushing the email string in the email input box to log in. The ‘session_password’ id input variable is the password assigned variable. Finally, the ‘sign in form’ button, which is div class ‘sign-in-form__submit-button’, which has the ‘click()’ action performed on it, simulating a mouse click.

Once this is run, you will have a Chrome window open with your linked in account logged in and ready to go.
